
I did the BCU Advanced Whitewater Safety and Rescue course with Steve MacKinnon (H2O Outdoors) and Dave Rossetter (Standing Waves, RCO, SCA, BCU, most everything). The course follows on from the basic Whitewater Safety and Rescue with more jumping in rivers, pulling people off rocks and running after boats. Here are my notes for my own benefit and anyone else who cares to read them.
We talked about safe paddling, how preparations for a safe trip have to be made from the start. The most useful bit of kit for a river leader/rescuer seems to be the 5 metre length of climbers webbing tape, often tied together to make a sling.
Creating an anchor is important for attaching ropes to boats or people. You can create one by tying the length of webbing strapping carried by all river leaders around a rock or tree. Tie it with an overhand knot or an overhand rethread water knot (stronger but harder to undo).
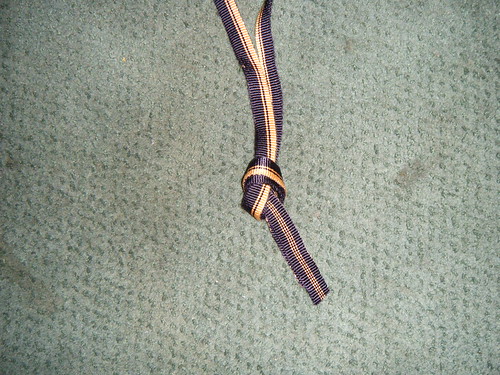
Climbers webbing/tape sling tied with an overhand knot.
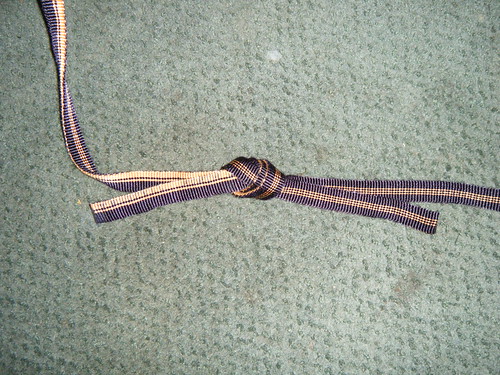
Tied with a rethreaded water knot
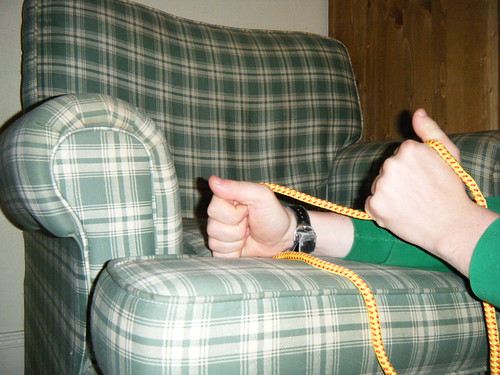
You can wrap the webbing around the anchor three times using the two untied loops as the anchor point, this is wrap 2 tie 1 and is usually more than is necessary for a kayak.
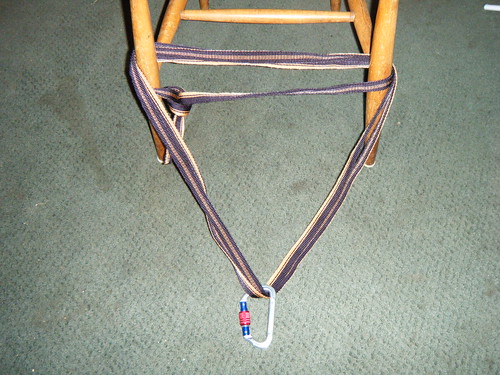
Using a chair as an anchor with wrap 2 tie 1 (trees are more common than chairs when paddling though)
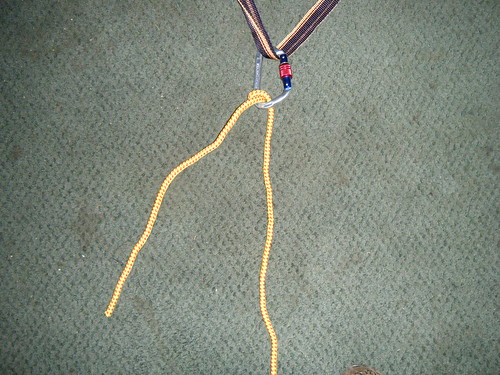
attaching your throwline to an anchor will create a pulley system for pulling a heavy object such as a person or boat.
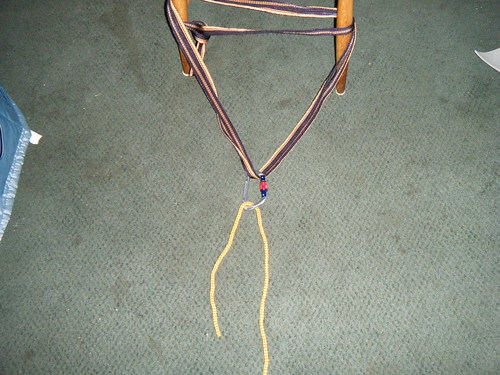
This is a basic 1:1 pulley, it offers no paticular advantage compared to just holding the rope except a change of direction may be useful depending on the terrain
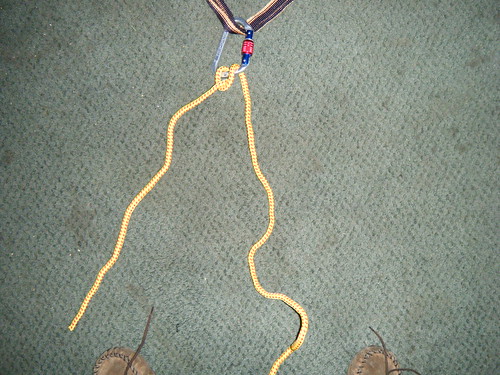
Here we’ve added a loop in the pulley, it means the holder does not have to hold full tension to keep the rope in place, however it can get tangled
Here we’ve added an italian hitch a much better way to create a belay to allow the holder to lose tension without slipping (but it does allow to move the rope backwards if needed).
A prussic is a ~1metre length of rope which is tied in a loop (with a double fishermans knot), the rope’s diameter should be smaller than that of your throwline rope. You use a prussic to tie a prusik knot with your throwline rope to act as a ratchet to allow the rope to be reset in position without slipping back under load. (I’m unclear why the BCU mispells the length of rope compared to the name of the knot but they seem to do it consistently).
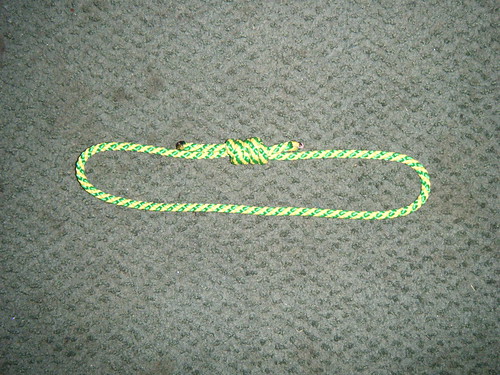
A prussic
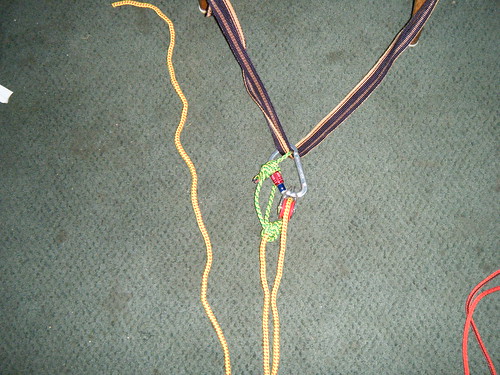
To pull a heavy load (e.g. pulling a full boat off a rock) you can create a pulley system. A 3:1 pulley system is made with an anchor, a throwline’s rope, pulleys, karabinas and prussics.
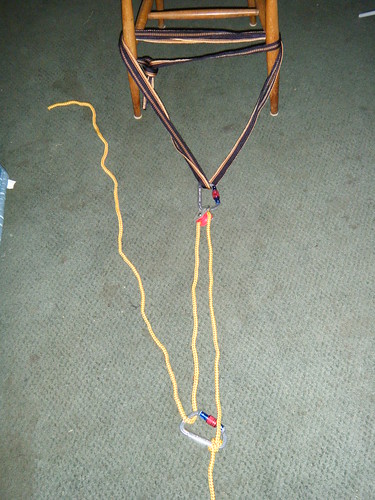
a 3:1 pulley system attached to an anchor (the chair) and tied with a clove hitch at the bottom. When pulling from the rope at the top the rope at the bottom (attached to your heavy canoe) will move with 1/3rd the effort compared to a straight pull and will move only 1/3rd the distance (if the boat is stuck on a rock this is often enough to get it off). Once the pulley has been pulled through the bottom karabina will have moved up to the top one and it can not be reset.

This pulley system has a prusik knot attached instead of a clove hitch at the bottom. Once the pulley has been pulled through the bottom karabina can be slid back down the rope to continue pulling more.
Here we have added a second prissic tied with a one way prusik knot called a Klemheist, this will stop the pulley being pulled back if you stop your load, however the knot is likely to get tangled in the pulley and a second person is needed to stop this happening.
Instead of a prussic you can use webbing tape to create a criss cross knot that does the same job
When helping a person down a slope you can attach the rope to their harness on their lifejacket. When raising you can put a rope around their body and hold with karabiner and clove hitch. Ropes used by canoeists aren’t suitable for a vertical lowering, only an aid on a slope.
When climbing down a bank you could lower a person down as described above or you could just attach a rope at the top (not to the person) and use that to help stabalise. Can lower boats using the 1:1 pulley system shown above. You can use alternate ends of the rope for each boat, lower on one end then next boat on the other end which is now raised.
When rescuing a person stuck in the middle of a river usually the first task is to create a stabalising line. Throw or row a rope across the river upstream of the victim (attach two together if on a wide river) and walk down to the victim. You can get it under his arms by pulling tight which will push it under the water briefly (you could also just push down with a paddle blade from the bank). In most cases a stabalising line is enough to allow the victim to save himself.
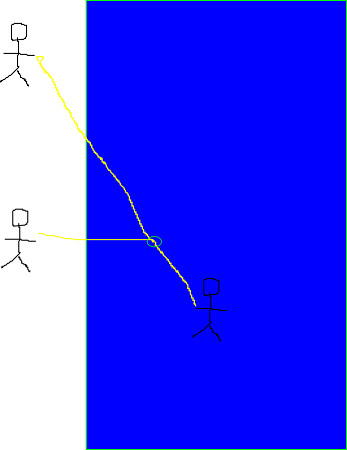
if you have to send in a person to help the victim use a V or Y lower rescue. Two throwlines are attached to the rescuer’s harness, lose end of one throwline is taken across to the other river bank. The rescuer swims in upstream of the victim and is lowered down the river current by those holding the ropes on the bank. In a Y rescue only one rope is attached to the rescuer and the second rope is attached with a karabina to the first, giving more of a vector to pull the rescuer over.
If you only have access to a single bank you can tie two throwlines together with a sling and have two people throw it over the victim to loop him.
A synch is a rescue system using four throwbags and four people, two on each bank. Two throwlines get stretched across the river from opposite sides on either side of the victim and attached to each other on the opposite bank. The attachment points then each get another throwline which acts as the reset/delay lines. The main lines get pulled tight to create a loop around the victim, the delay lines can be pulled to withdraw the loop or adjust its position.
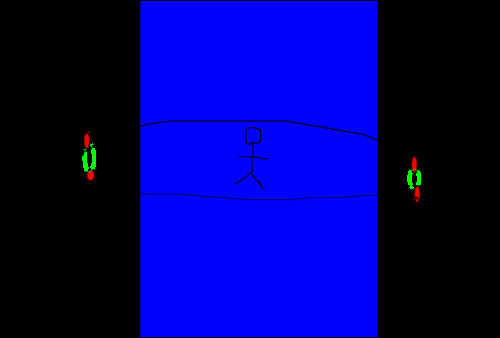
A person trapped in a river being rescued by a synch. 1 & 3 are main lines, 2 & 4 are delay lines. This is only useful if you have people on both banks who know how to do this method of rescue.
When chasing a boat down a river which has been separated from its paddler you usually want at least two people, one can scout ahead for danger or opportunities. First thing is to turn the boat upright making it easier to move. Can use a sling to move it.
When rescuing a swimmer from the bank with a throwline (or sling) it is important to shout instructions at the person, often to the point of being aggressive and bossy (you can appologise for being rude once they are safe). You need a good stance. A second person can hold you if you have poor footing, or can hold the rope if poor grip or load is too heavy (and a swimmer in a rapid is a very heavy load). Always hold the rope with thumbs upwards (fingers and wrists turned down). A second rope can be added to the first one to act as a vector pull.
holding a rope in a z-grip with thumbs up
throwline with vector line, the vector line makes it much easier to pull the victim to the bank
Live bait means jumping in the river to grab hold of a swimmer in a current. The rescuer has a throwline attached to their life jacket harness. Jumping in too late is better than too soon, the victim can get tangled in the rope if you jump in downstream of them.
Once the victim is at the bank he may need some first aid or comfort. You can use spraydecks or life jackets to provide padding and insulation from the ground. Airbags make for good pillows. Your ever handy tape/webbing sling can be used as a tie for a leg splint or an arm sling. Airbags can help pad out the splint or sling too. A victim who can’t walk can be carried with slings.